
Headshots for Actors
Professional actors know a headshot is an incredibly valuable and required tool in your kit.
But there’s so much debate and confusion about what’s required in an actor’s headshot it can be overwhelming to even know where to start.
A recent thread online inspired me to put together this quick infographic for my acting industry friends to help dispel some of the mystery and misinformation surrounding what differentiates an actor’s headshot from other types of headshots.
But y’all who know me know I prefer not to do things quickly.
I prefer long.
And thorough.
(This particular subject I’ve dissected so thoroughly I’m publishing a book on it. More on that very soon. ;)
In the meantime, let’s look at this just a wee bit more in-depth.

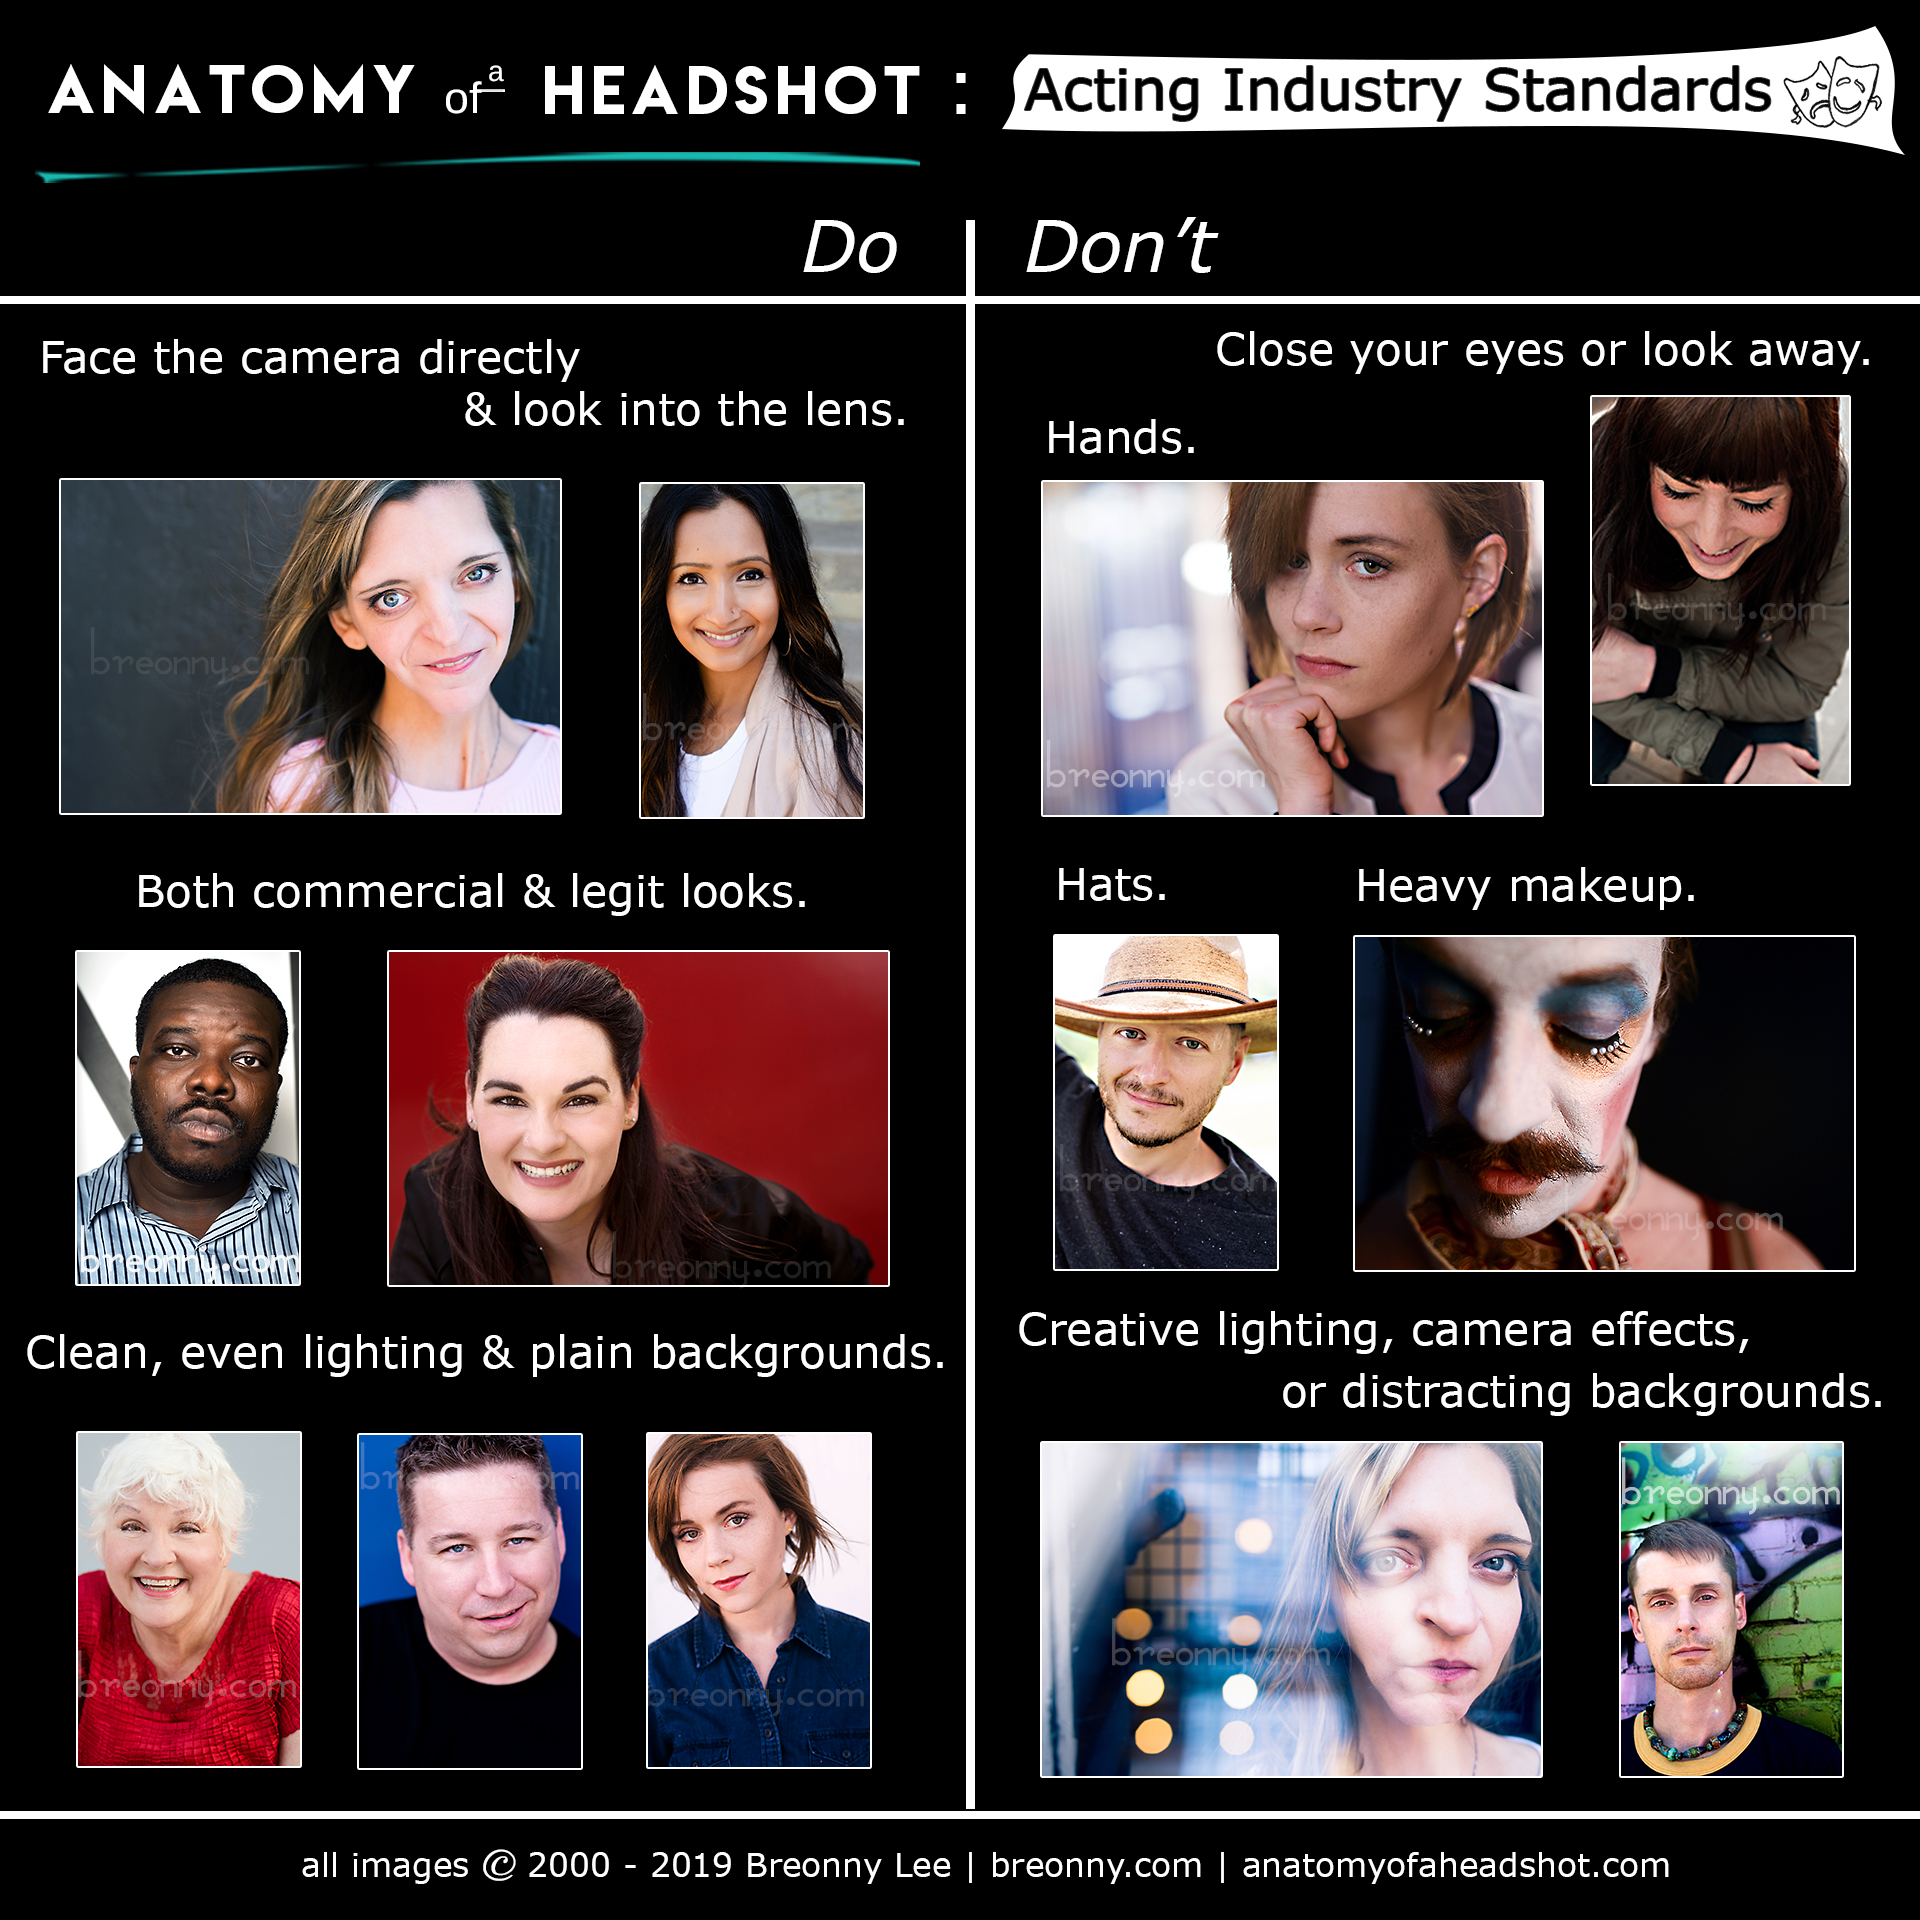
Note: This is not a headshot!
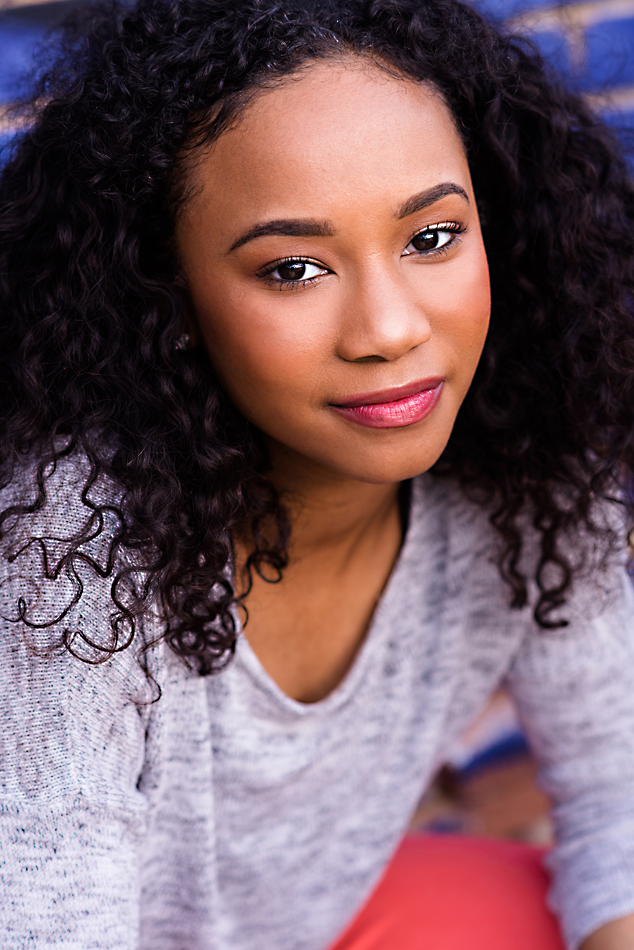
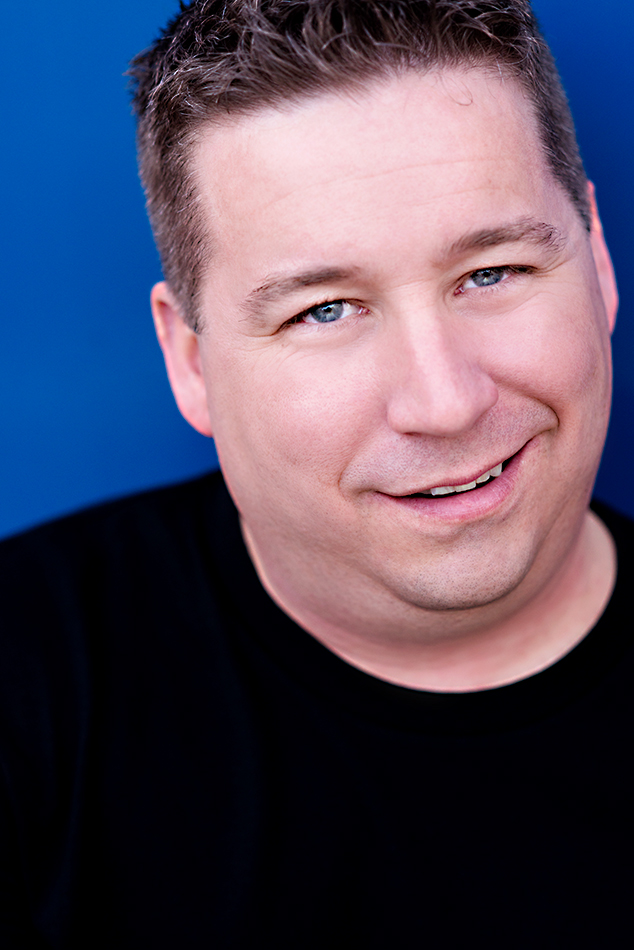
Actors’ headshots have the most demanding standards.
As an actor, your headshot has two very specific goals:
Grab a casting director by the eyeballs.
LOOK LIKE YOU when you show up for the audition!

The single biggest mistake you can make is submitting a headshot which doesn’t look like you when you walk into an audition.
This is much more common than you might think and takes a variety of forms. Often this is simply because your headshot is outdated. Other times the makeup is too heavy, or just inconsistent with your regular look. It could be because you normally wear your hair straight but had it curled for your headshots. It could be because your retoucher got carried away…
Then there’s always the temptation to choose final images which are the most flattering simply because they are the most flattering. This is a grave mistake. Submitting a headshot where you look 20 pounds thinner or 20 years younger than you do in person will only frustrate the casting director and probably guarantee they never call you back.
Whatever the reasons, avoid this pitfall with these guidelines:
The second biggest mistake you can make is submitting a headshot which doesn’t stand out from the crowd and blends in with the rest.
Similarly, submitting a headshot which isn’t a true headshot or stands out because of how bad it is is a wonderful way for your headshot to end up in the proverbial trash bin.
The best way to avoid this is to hire a professional photographer who specializes in headshots for actors, as actors’ needs are more stringent and demanding than other industries. (Most industries enjoy more creative leeway for headshots than actors do. Sorry ’bout ya.)
While it might be tempting to skimp on headshot photography to the delight of your pocketbook, agents and casting directors will not take you seriously if you submit amateur headshots.
You’d be wise not to prematurely spend your hard-earned cash on professional photographers who produce pretty pictures but don’t understand acting industry standards or, worse, on fauxtographers who simply don’t know what they’re doing.
If someone offers to shoot your headshots for free, absolutely take them up on it! …for the invaluable learning experience it is. Think of it as practice getting comfortable in front of the camera. Then hire a professional when you feel ready.
Actors’ headshots require attention to detail, precision, and a keen understanding of what the casting director is looking for.
Choose photographers who clearly demonstrate a working knowledge of acting industry standards and adhere to the following general guidelines:

Other things to consider:
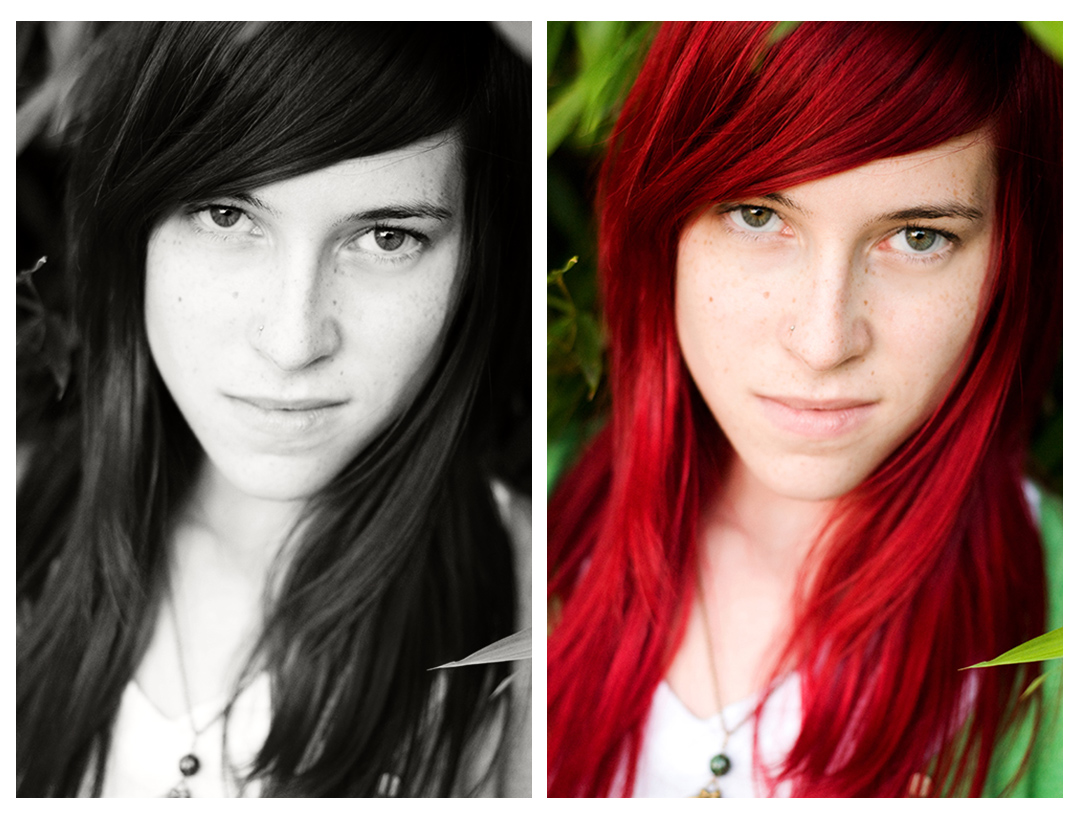
Color or Black & White?
Color. Absolutely. 100% of the time.
Black & white fell out of favor around the turn of the century when advances in imaging technology made color printing and retouching less cost prohibitive and more accessible for everyone. The printing costs for color and b&w are nearly identical for most processes now. Moreover, most images are viewed online now where there’s never an extra fee to upload color instead of b&w.
All other factors equal, color just reveals so much more rich data about your skin tone and eye and hair color.
Vertical or Horizontal?
Both are acceptable depending on the situation. When in doubt, choose vertical.
There’s still some disagreement across the field as to when it is more appropriate to use vertical or horizontal headshots.
Much of the time, casting directors are viewing headshots on computer screens where horizontal headshot usually take up more of the screen and provide more detail. I typically prefer horizontal headshots for screen.
When you do hand a physical headshot to a casting director they file these in cabinets or binders and flip through whole folders full at a time. Anecdotally, I hear they tend to find it a bit annoying to rotate a horizontal headshot to see it properly. Other people swear this little bit of annoyance is worthwhile because it forces the casting director to spend more time on your headshot.
Personally, I’m not convinced annoyance is the best method to grab attention, and I prefer printing vertical headshots for this reason.
Unless the horizontal is truly that magical.
To crop the top of the head or not?
As the most important feature of a headshot is the eyes, anything which helps enhance the eyes and help them pop off the page is fantastic. Cropping the top of the head removes a bit of superfluous data to put more emphasis on the eyes. Casting directors don’t really care about your whole hairdo; it can even be distracting! In most situations, it is not only perfectly acceptable but desirable to use an image which crops the top of the head for your primary headshot.
However, it is important to have a few shots which pull back and show more of your body type and your whole hairline in your portfolio.
Just be sure to include at least one three-quarter or full-body in your portfolio, and you’re golden.

We’ve covered a lot, but there’s still a heckuva lot more that goes into:
Please drop me a line or leave a comment below with your best tips for getting fantastic headshots, or your greatest frustrations ending up with not-so-fantastic headshots.
I’m collecting research for an important project (which may or may not be the aforementioned book… a nudge is as good as a wink to a blind bat, eh?) and I welcome all of your input.
Thank you. <3